
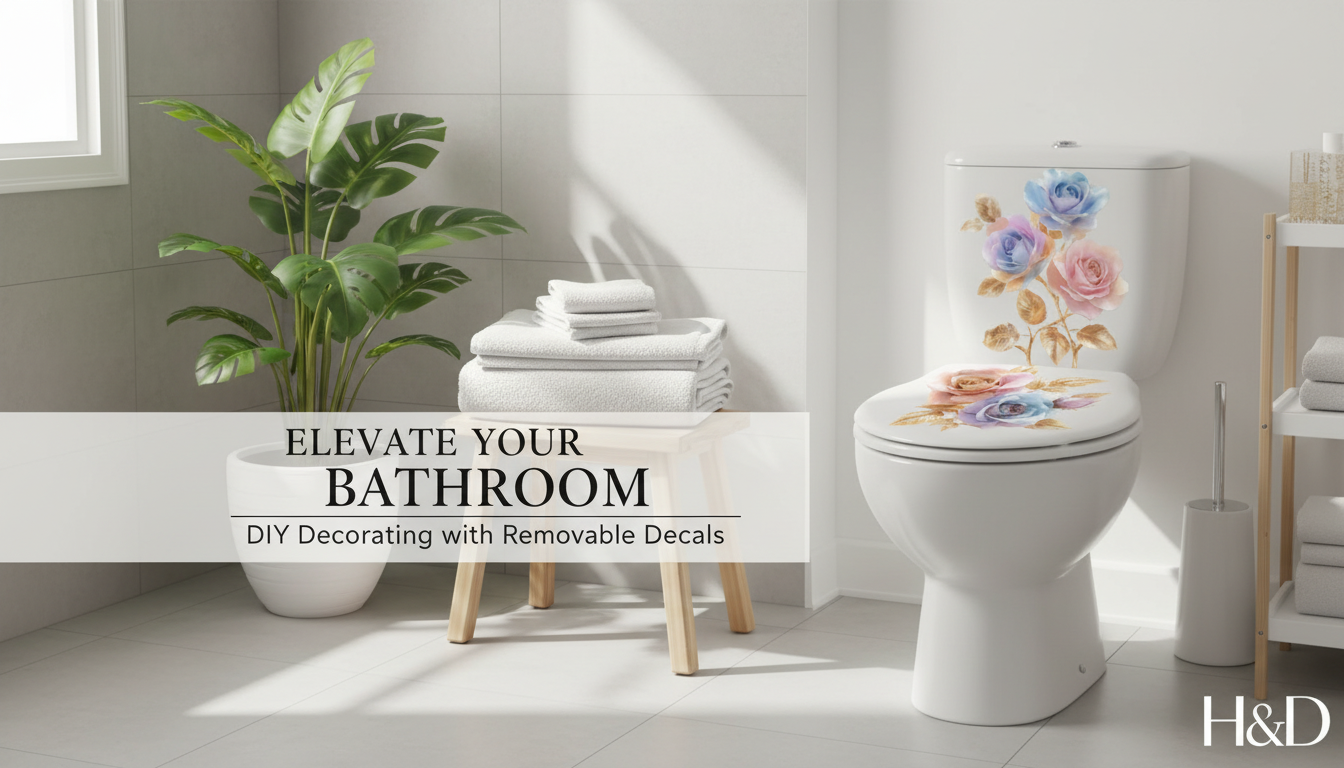
A small decor change can make a bathroom feel more finished without paint, drilling, or permanent hardware. A waterproof rose flower wall and toilet decal set is designed for humid spaces, giving you a coordinated floral accent on smooth surfaces like tile, painted walls, and the exterior of a toilet—while keeping everyday wipe-downs simple.
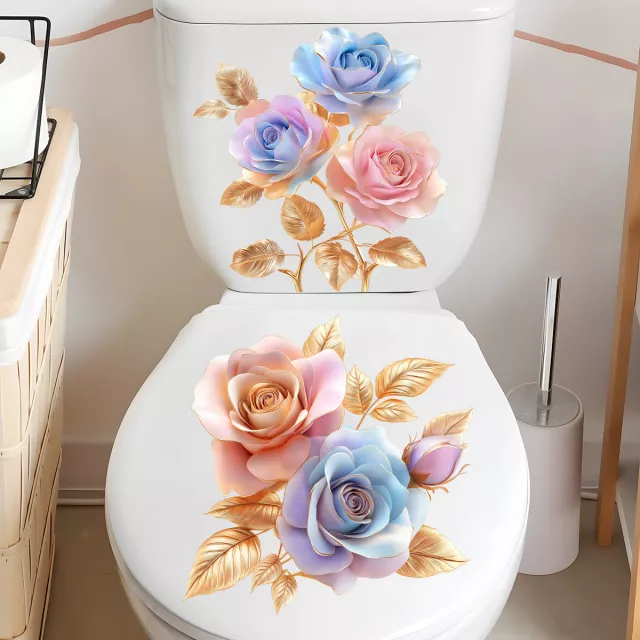
This set is meant to create a matched look by pairing rose-themed decals for wall placement with decals that can be applied to the toilet exterior. Because bathrooms run warm and steamy, placement matters: the best results come from clean, dry, smooth surfaces where the adhesive can fully contact the material.
| Placement area | Surface type | Why it works | Prep reminder |
|---|---|---|---|
| Above toilet tank | Painted wall (smooth/semi-gloss) | Creates a focal point without crowding the room | Wipe dust; allow wall to fully dry |
| Toilet tank exterior | Plastic/porcelain exterior | Ties the theme together at eye level | Clean with mild soap; dry completely |
| Shower-side accent | Tile | Handles humidity better than paper decor | Remove soap residue; dry grout edges |
| Vanity side panel | Laminated wood/finished cabinet | Adds detail to flat surfaces | Degrease fingerprints; avoid waxed finishes |
Bathrooms are tough on decor: condensation, temperature swings, splashes, and frequent cleaning can quickly make traditional wall art look tired. Waterproof decals are a practical alternative when you want style without adding items that absorb moisture.
If your bathroom tends to stay damp, basic moisture control also protects finishes overall. The CDC and EPA both emphasize cleaning and preventing moisture buildup to reduce mold risk; practical guidance is available from CDC mold cleanup and prevention and the EPA’s mold resources.
Decals look most polished when they feel integrated with the rest of the room instead of “floating” randomly. A few small styling choices can make the roses read like a planned design element.
Most adhesion issues come from leftover moisture, cleaner residue, or oils that prevent full contact. A careful start usually makes the difference between decals that stay crisp and edges that lift.
A major advantage of decals is that they can be removed when you’re ready to change the look—especially helpful in rentals or guest baths that get seasonal refreshes.
For a coordinated bathroom refresh, start with the Waterproof Rose Flower Wall & Toilet Decal Set (in stock). It’s designed to bring a matching floral look to both wall areas and the toilet exterior, making small bathrooms feel more styled without permanent changes.
If you’re pairing a quick decor update with a general home reset, these in-stock digital downloads can also help streamline routines:
They adhere best to smooth, clean, dry surfaces; heavy texture reduces contact and can cause edges to lift. If the wall has light texture, test a small piece first to confirm it holds.
They can be used on the outside surfaces if you clean with mild soap and fully dry first. Avoid placing decals where frequent rubbing happens or where tight curves and seams prevent full contact.
Peel slowly at a low angle, and use gentle heat (like a hair dryer on low) to soften the adhesive if needed. Fully cured paint and a slow, steady pull help reduce the risk of paint lifting.


Leave a comment