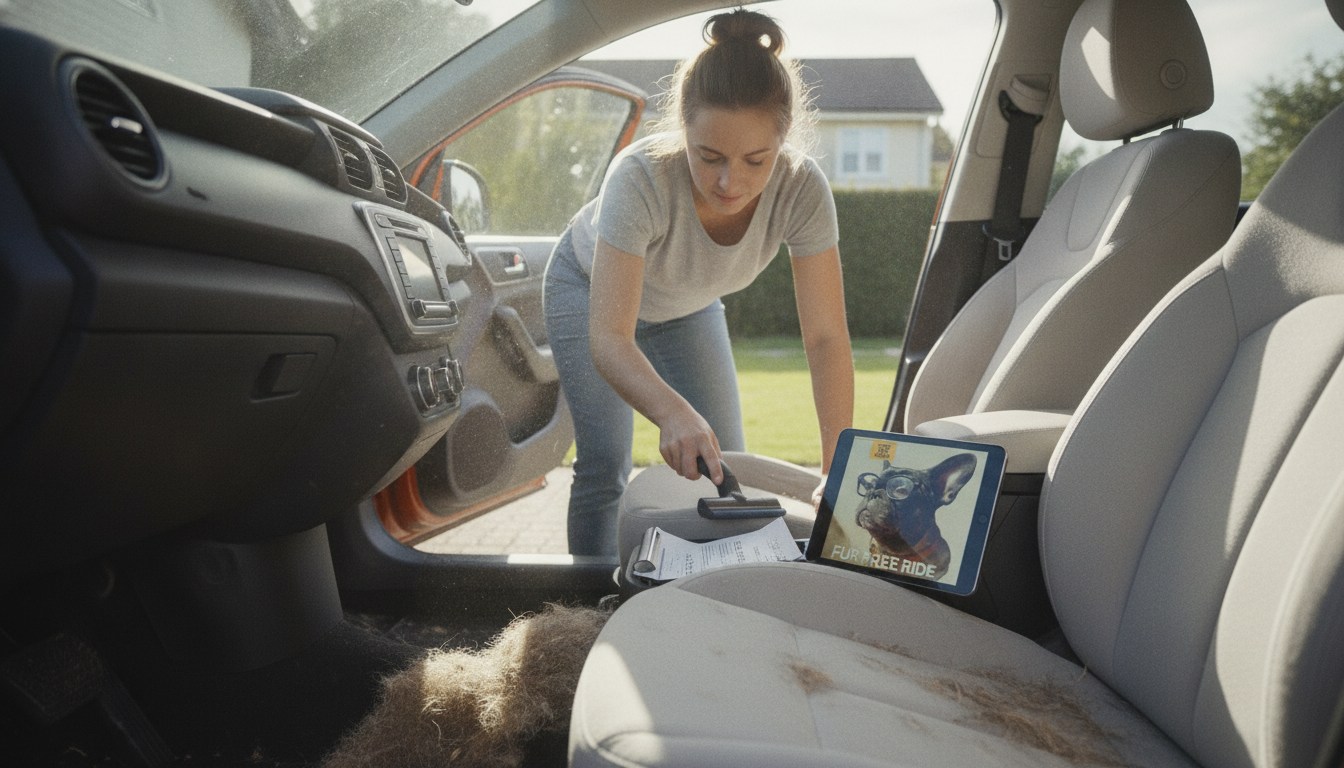
Fur Free Ride: A Simple Routine for Getting Pet Hair Out of Car Seats
Pet hair clings to upholstery, sinks into seams, and reappears right after a quick vacuum. A consistent, low-stress routine—paired with the right tools—can keep seats, floor mats, and cargo areas looking clean between trips. The goal isn’t perfection every time; it’s a repeatable reset that stops hair from building up in the places that take the longest to fix later.
Why pet hair sticks so stubbornly to car seats
Car interiors are basically a hair-catching system: fabric fibers grab, seams hide, and airflow swirls strands into corners. A few common factors make it feel like hair “won’t vacuum out.”
- Static electricity and friction bind hair to fabric fibers, especially in dry weather.
- Seat seams, stitching lines, and seat-track edges trap hair beyond the reach of casual vacuuming.
- Some upholstery (velour, tweed-like fabric) holds hair more aggressively than leather or tightly woven cloth.
- Hair mixed with dander and oils can cling like lint, requiring agitation—not just suction.
Quick prep before cleaning (2 minutes that save time later)
A tiny bit of prep keeps hair from spreading and helps you see what you’re actually removing.
- Remove loose items: toys, leashes, blankets, and any seat covers; shake them outdoors first.
- Open doors on both sides when possible to improve airflow and visibility for seams and corners.
- If the interior is dusty, do a light wipe of hard surfaces first so hair doesn’t get redistributed.
- Keep a small trash bag nearby for clumps pulled from creases and carpet edges.
Step-by-step: removing hair from cloth seats and carpeted areas
This routine uses a simple pattern: lift first, then vacuum. Most frustration comes from trying to vacuum hair that’s still woven into fibers or packed into seams.
- Start with dry agitation. Use a rubber brush, rubber glove, or pet-hair stone to lift hair into piles. This breaks the static bond and pulls hair up from the nap of the fabric.
- Work top-down. Do headrests and seat backs first, then seat bottoms, then footwells and the cargo area. Gravity is your friend—don’t fight it.
- Use short, overlapping strokes toward a “collection zone.” Pick one corner of each seat (for example, the front outer corner) and push hair there so you’re not chasing it across the entire panel.
- Vacuum after agitation. A crevice tool for seams and a brush tool for broad panels works best. Keep the nozzle slow over seams so suction has time to grab what you loosened.
- For embedded hair, repeat strategically. Do agitate → vacuum → spot-agitate seams → final vacuum pass. Repeating the whole seat isn’t necessary if you target the stubborn zones.
- Finish with a “missed spot sweep.” Check seat-track edges, between the seat and center console, and under child-seat anchors—these areas collect hair like little traps.
What to use (and when) for common car interior surfaces
| Surface |
Best first step |
Best follow-up |
Notes |
| Cloth seats |
Rubber brush/glove agitation |
Vacuum with brush tool |
Agitation lifts hair so suction can remove it. |
| Seat seams & piping |
Crevice agitation (rubber edge or stiff nylon brush) |
Vacuum with crevice tool |
Slow passes; seams are the main hair reservoir. |
| Carpet footwells |
Rubber brush toward one corner |
Vacuum high suction |
Pull mats out to clean edges and underside. |
| Cargo area carpet |
Rubber brush in long strokes |
Vacuum + crevice tool |
Check tie-down loops and corners. |
| Leather/pleather |
Microfiber wipe (dry then slightly damp) |
Vacuum edges/crevices |
Avoid harsh abrasives; hair usually lifts more easily. |
When hair is mixed with sand, crumbs, or mud
Extra debris changes the order of operations. The wrong first step can grind grit deeper into fabric.
- Vacuum heavy debris first to avoid grinding sand into upholstery during agitation.
- Let mud fully dry before removal; dry clumps break apart and lift easier than wet smears.
- For sticky spots, use a lightly damp microfiber cloth, then finish with a dry cloth to reduce static.
- Deodorizing is optional. Use a fabric-safe, fragrance-light approach if pets are sensitive. For general pet health and hygiene reminders, refer to guidance from CDC — Healthy Pets, Healthy People and ASPCA — Grooming and Care.
Prevent hair buildup between deep cleans
A printable checklist that makes the routine stick
Quick reset (5–8 minutes)
Deep clean (20–30 minutes)
Digital guide: Fur Free Ride
If a repeatable routine is the hardest part, a simple guide can help you stay consistent. The Fur Free Ride digital guide and easy car cleaning checklist is designed for pet owners who want an approachable system for cloth, leather, and mixed interiors—especially for targeting seams, corners, and hard-to-reach areas.
To make the process even easier, setting a short timer helps prevent “I’ll finish later” halfway-clean results. A durable option like the Rugged AMOLED Smartwatch with 3D Curved Display & Bluetooth Calling can keep a dedicated 8-minute reset on schedule—useful when you’re cleaning between errands.
FAQ
What removes pet hair from car seats the fastest?
The fastest method is a two-step approach: rubber agitation first (brush, glove, or stone) to lift hair, then vacuum to remove it. Always do a dedicated pass on seams and crevices, where most hair hides.
How do you get dog hair out of car seat seams and cracks?
Use a crevice tool with slow, controlled passes, and pair it with a small brush or rubber edge to dislodge packed hair. Work in short sections and repeat once—seams often need more than one cycle.
Does fabric softener help remove pet hair from upholstery?
It can reduce static in some cases, but it should be used cautiously to avoid residue or sensitivity issues. A safer option is a slightly damp microfiber wipe after agitation, followed by a dry pass to keep hair from re-clinging.
Recommended for you


Leave a comment